
How to Collect Photos from Volunteers: A Simple System for Nonprofits
The easiest way to collect photos from volunteers is to give them one private place to upload from their own phones, and to share it before the event starts. Without that, photos end up on dozens of phones, in text threads and in email, and the person in charge of communications spends hours chasing them.
This guide shows how to collect photos from volunteers in six steps: set up one shared space, invite volunteers with a link or QR code, keep uploads organized, protect privacy, and put the photos to work for fundraising and storytelling.
Why collecting volunteer photos is challenging
Volunteers take the best photos of your work, because they are in the middle of it. The problem isn’t the photos themselves. It’s getting them back to your team.
-
Photos stay on personal phones. The best shots sit in camera rolls, text threads, and personal email, where the people who need them never see them.
-
Your team can’t be everywhere. Staff can’t attend every event, trip, or location, so they depend on volunteers to send current photos.
-
Uploading is too hard. If sharing means finding a link, making an account, or emailing large files, most volunteers won’t bother.
-
Nobody owns the process. With a small staff and no dedicated photographer, collecting photos becomes one more task for whoever has time.
-
Privacy is an afterthought. Group chats and public posts make it hard to control who can see, save, or repost photos of children, clients, or participants.
The fix is a simple system: one shared space the organization owns, an easy way in for volunteers, and a clear structure for what comes out.
How to collect photos from volunteers, step by step
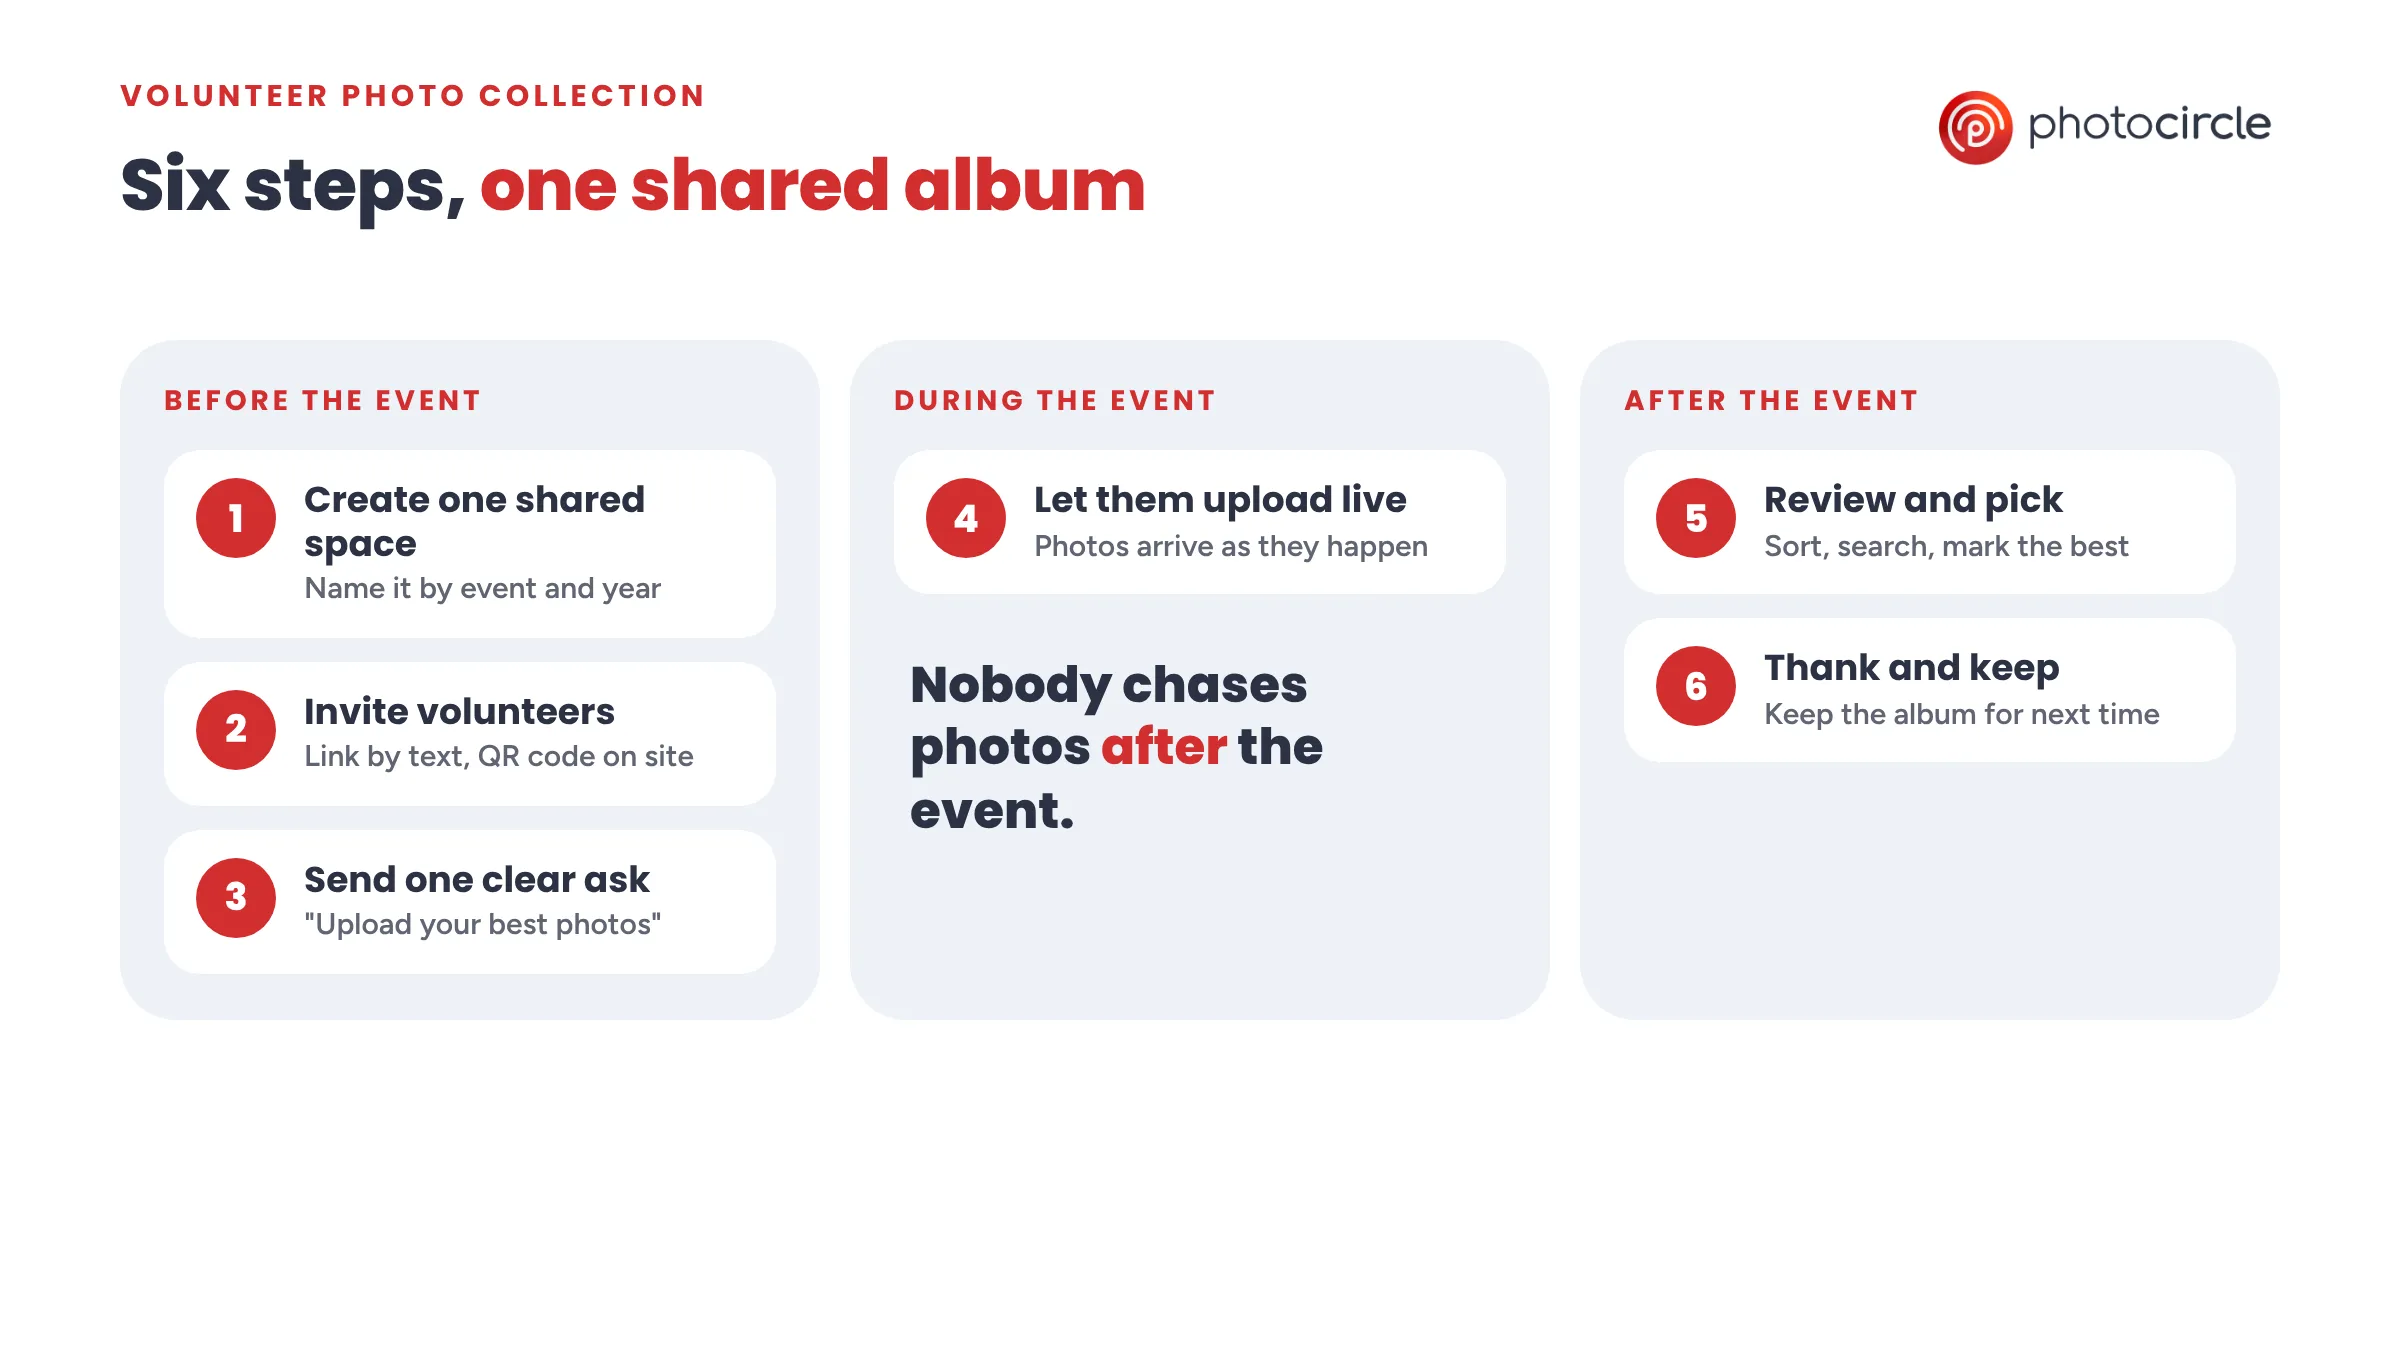
Think of it in three moments. Most of the work happens before the event. During the event, volunteers upload, and you stay out of the way. After the event, review the photos, thank volunteers, and organize your collection.
Before the event
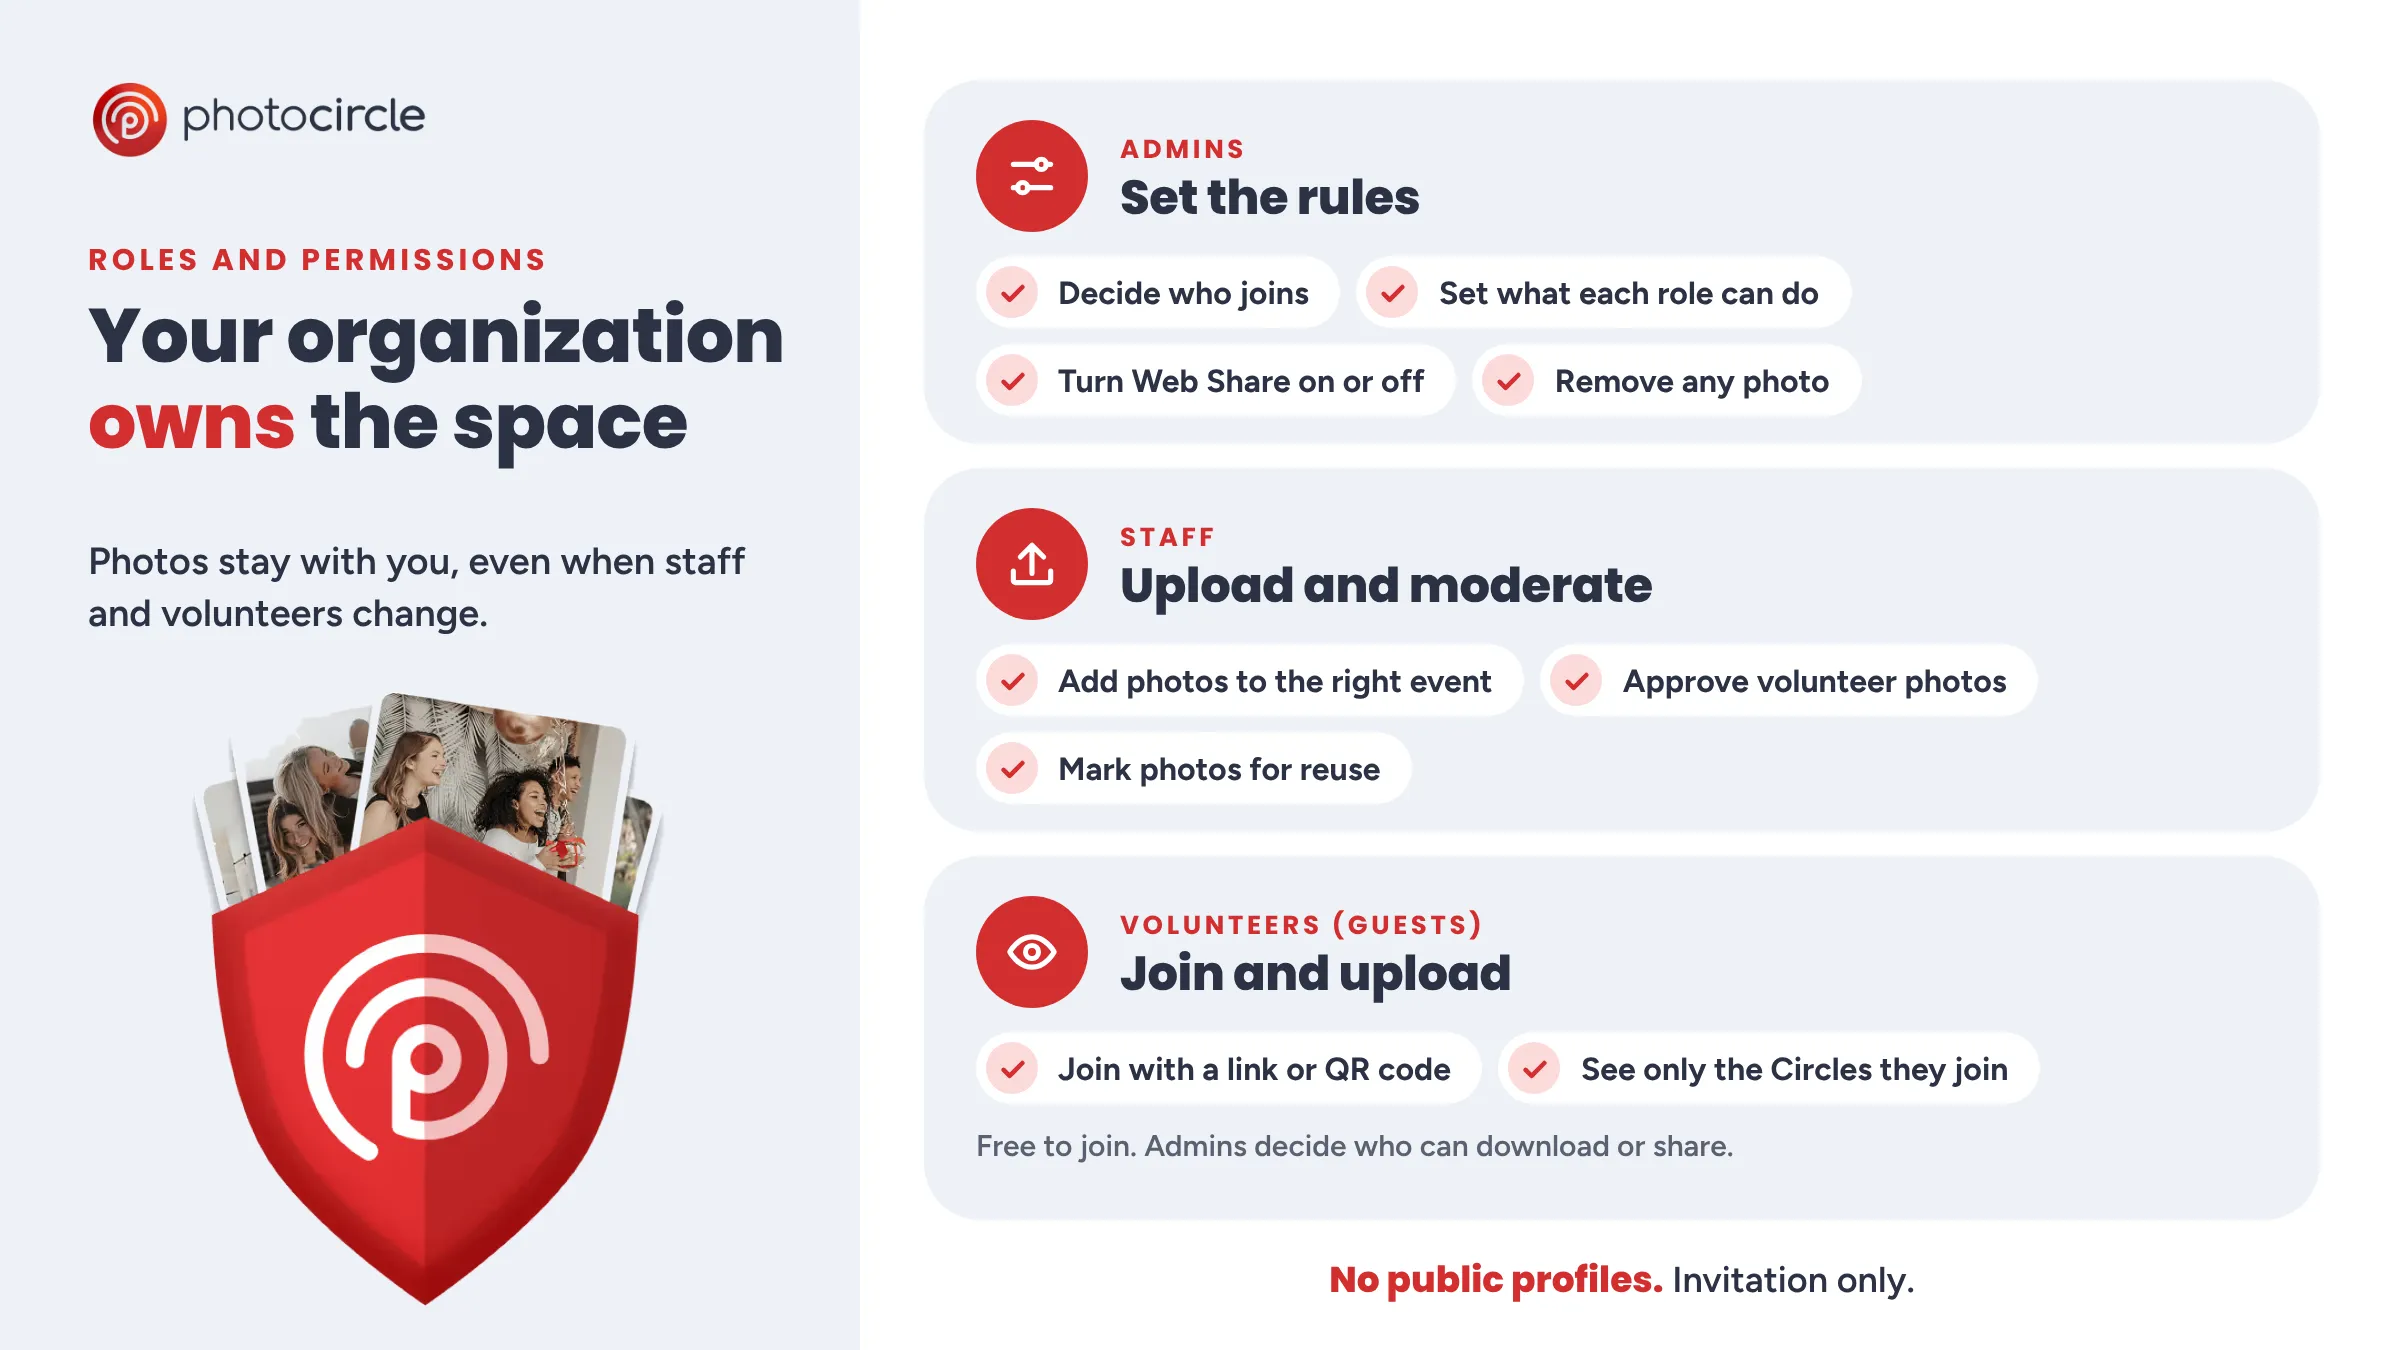
Make two quick decisions first. Name one person who answers volunteer questions and keeps the album tidy, and decide who can only upload and who can also view everything or manage content.
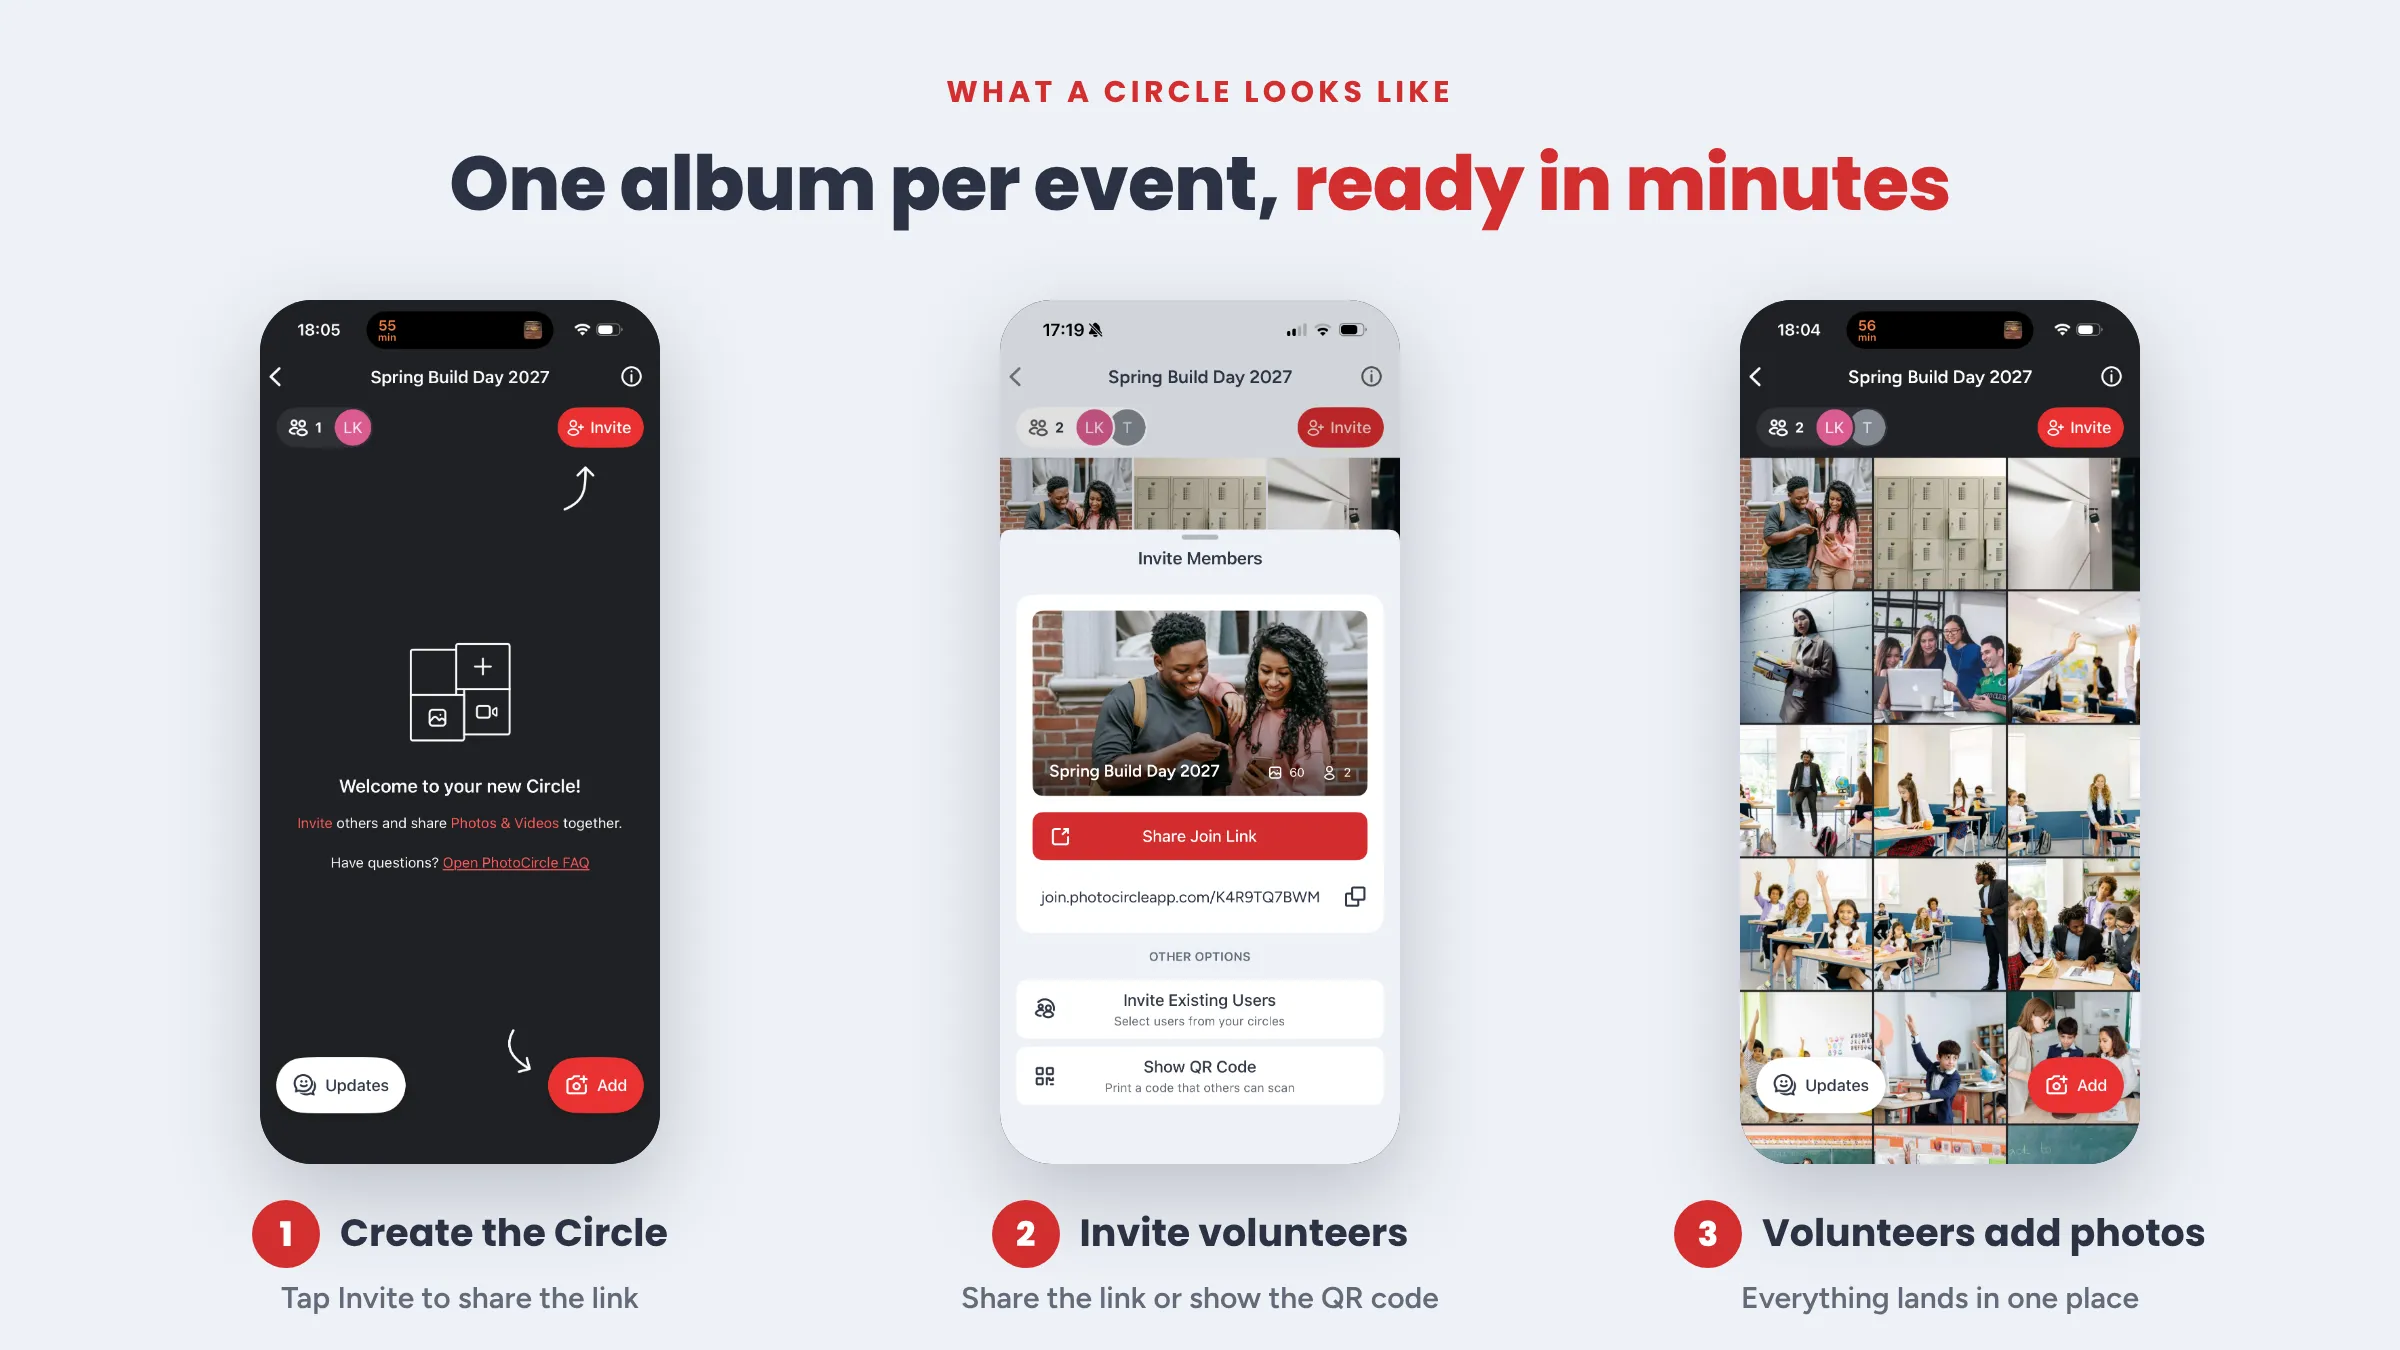
Step 1: Create one shared space. Create an album under your organization’s account rather than a staff member’s personal account. Name it by event and year, or by your own trip code.
Step 2: Invite volunteers. Send the join link by text or email, and print the QR code for people who show up in person.
Step 3: Send one clear ask. Write one short message before the event. For example: “Join our event album with this link, then upload your best photos and videos from your phone. Please do not post them elsewhere.”
Then make joining as easy as possible. Volunteers are more likely to upload when the process is quick and simple.
-
Use a QR code for people on site. Print it for a sign-in table, a banner, or a name-tag card, so volunteers can scan it when they arrive and start uploading right away.
-
Send the link early for trips and long events. Volunteers can then upload from their phones throughout the event instead of at the end.
-
Ask for one thing. “Upload your best photos from today” is enough. Skip instructions about file sizes, folders, or naming.
-
Run a short walkthrough for staff. Mixed comfort with technology is normal, and a short session is usually enough for the team that manages the album.
-
Choose a tool volunteers can join for free. Nobody should need to pay or build a complicated account to share a photo.
During the event
Step 4: Let them upload while it happens. Volunteers add photos from their phones during the event, straight into the same album. Staff see new photos as they arrive, so nobody waits for a pile of files afterward. Most volunteers will use the mobile app, while the person managing the album often prefers the web version for reviewing photos and building slideshows. If you use moderation, approve photos in batches during breaks.
After the event
Step 5: Review and pick what you need. Sort by date, search, and add a keyword such as “marketing” to the captions of photos you want to reuse, so you can find them again without scrolling through everything.
Step 6: Thank volunteers and keep the album. Leave it in place. Volunteers can come back to it, and your team can return to it for newsletters, reports, and anniversaries.
Keep photos organized so you can find them later
Collecting photos is only half the job. You also need to find the right one months later, when a donor report or anniversary needs it. In PhotoCircle, use two levels: a Circle is the album for one event or trip, and a Group is the folder that holds related Circles. Pick one naming pattern and use it every time.
| How you run things | How to name the Circle | What it makes easy |
|---|---|---|
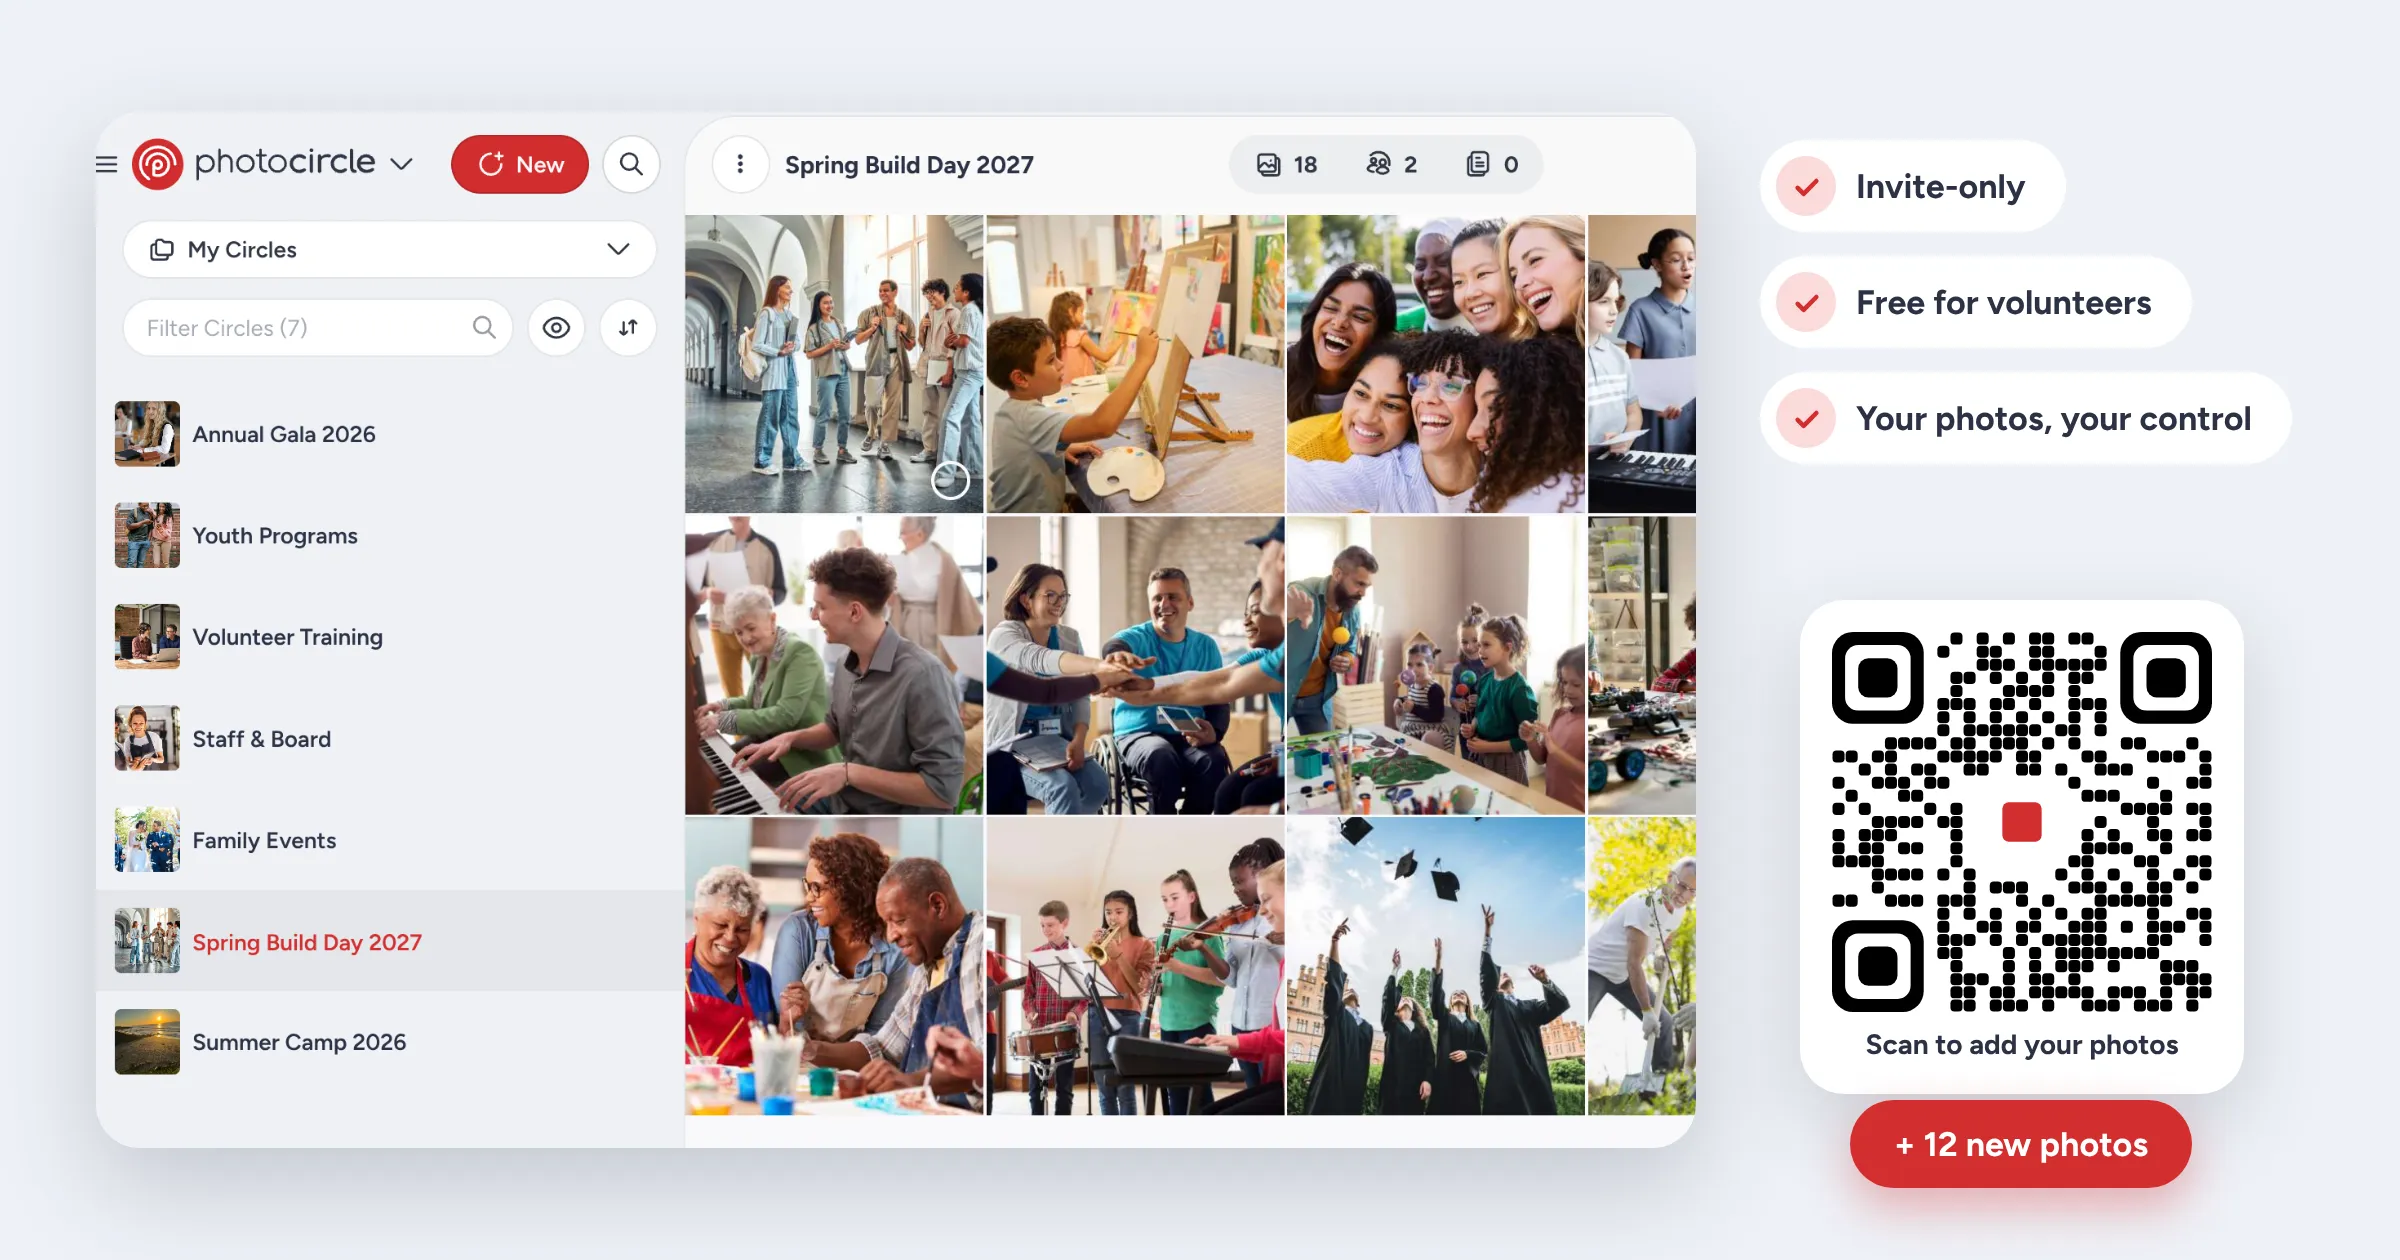
| Recurring events | Event name and year, such as “Spring Build Day 2027” | Finding every photo from one event, year after year |
| Programs with several sessions | Program and year, with each session as its own Circle | Comparing sessions and finding a participant’s photos from a given year |
| Trips | Trip number or code and location | Searching by trip or place, even years later |
| Volunteer groups and projects | Group, project, date, and location | Quick attribution and sharing with the right audience |
Groups are included in every Nonprofit & Community plan. Workspace Admins create them in the Admin Console and can nest them as deep as needed, for example, year, then program, then event. You can filter your Circles by Group in the web app. On the Advanced plan, each Group can also have its own branding, moderation, and permissions. On Basic, permissions are set once and apply to every Group.
Two habits keep this working. First, add a short caption or keyword to photos you plan to reuse. Second, keep old Circles instead of deleting them. A searchable archive is what lets small teams build slideshows, anniversary materials and donor updates from real photos without starting from scratch.
Privacy, consent and control
Volunteers often photograph children, clients, families and people in vulnerable moments. Set the rules before the first upload.
-
Check your photo release and policy first. Know who has agreed to be photographed before anything is shared or published. This is general guidance, not legal advice.
-
Keep the space invite-only, with clear guidelines. Volunteers join by invitation and see your rules before they upload, such as “Don’t repost photos or videos from this circle on social media.”
-
Review before photos go live, if you need to. Moderation holds volunteer photos until a Moderator approves them.
-
Limit downloads and public links. Disable downloads for sensitive groups, and keep Web Share off unless you need it.
How to set it up in PhotoCircle
PhotoCircle for Nonprofit & Community is built for this workflow. The setup process has two parts: a one-time setup for your organization, then a two-minute routine for each event.
Once, for your organization (about 15 to 30 minutes)
- Open the Admin Console. In the web app (photocircle.app), click the arrow next to the PhotoCircle logo and choose Admin Console.
- Create your Groups. Add folders that match how you work, such as years, programs, or trips.
- Add your branding. Upload your logo and colors so every Circle looks like yours.
- Set roles and permissions. Choose what Contributors and Guests can do, including comments, downloads, and Web Share.
- Ask for moderation and guidelines. Email support@photocircleapp.com with your organization’s legal name, an address for photo-removal requests, and the guidelines you want volunteers to see. The team sets these up for you.
- Invite your staff. Add the team members who will manage photos. They are the ones who take paid seats.
For every event (about 2 minutes)
- Create a Circle. Choose the right Group and name it with the event and year.
- Open Invite. Copy the Join Link, or show the QR code to print.
- Share it. Volunteers join as free Guests and can upload right away.
Real examples: Pensacola Habitat, Camp No Limits and Casas por Cristo
Pensacola Habitat for Humanity: one Circle per group, event, or project
Pensacola Habitat for Humanity has built more than 1,600 homes in Escambia and Santa Rosa Counties since 1981. Photos from volunteer days used to end up on phones, in email, in texts, on cameras, and on shared drives. The team now creates a Circle for each volunteer group, event, or project and adds the date, location, and group details. Volunteers add photos from their own phones, and staff can find them all in one place. The team says the system saves several hours a week, and a single 30-minute training session was enough to get people started.
Camp No Limits: a QR code at every camp
No Limits Foundation is a 501(c)(3) founded in 2004. It runs 12 camps, and each camp has a QR code that lets families, volunteers, and staff add photos and videos. A camp averages more than 500 photos and videos and can reach 1,400. The team organizes Circles by year and then by camp, tags favorites with “marketing” in the caption so staff can find them for outreach, sorts slideshows by date, and uses download control and a logo watermark to protect images of campers. Families come back year after year, and the library grows as the organization moves toward its 25th anniversary.
Casas por Cristo: one Circle for every mission trip
Casas por Cristo has run mission trips from El Paso, Texas since 1993 and has housed more than 7,000 families. Before each trip, staff invites the participants to a new Circle named with the trip code. During the trip, groups add photos as they work, and the communications team picks up current images for newsletters, social posts, and fundraising without chasing people afterward.
All three organizations follow the same approach. Create the album before the event, invite people with a link or QR code, give them one simple task, and keep the photos in an album your organization owns.
FAQ
Do volunteers need a paid PhotoCircle seat?
No. Only staff or representatives of your organization need paid seats. Volunteers, families, and community members join a Circle as free Guests through a Join Link or QR code.
How do volunteers add their photos?
They open your link or scan your QR code, join the Circle on the PhotoCircle app or the web, and upload from their camera roll. Staff can approve photos first if Moderation is on.
Can I collect photos from several events or locations?
Yes. Plans include unlimited Circles, so each event, trip, camp, or volunteer group can have its own album. Name Circles by date, place, or trip code so they are easy to find later.
What about photos of children or vulnerable people?
Check your release and photo policy first. In PhotoCircle, you can keep Circles invite-only, show guidelines before people upload, turn on Moderation, and limit downloads and sharing.
Can I control who downloads or shares photos?
Yes. Admins can open or close downloads for each role, add a watermark on plans that include it, and switch Web Share on or off in the Admin Console.
Who owns the photos?
Your organization does. Photos stay in the Circle when staff or volunteers leave.
How much does it cost?
Nonprofit & Community plans start at $3 per seat per month for Basic, or $10 per seat per month for Advanced. You pay per seat, and only staff or representatives of your organization need one: the people who create Circles, manage members and settings, or moderate and organize photos. Volunteers, families, and community members join Circles as free Guests, so adding more volunteers doesn’t add to your bill. https://www.photocircleapp.com/nonprofit-community/